2.4. Creating a Virtual Machine (VM)
2.5. Defining the VM
Now you are ready to create a virtual clone of your computer hardware and install a Linux Operating System on the clone. Pretty trippy if you think about it.
- First, start VirtualBox. You should see this window.
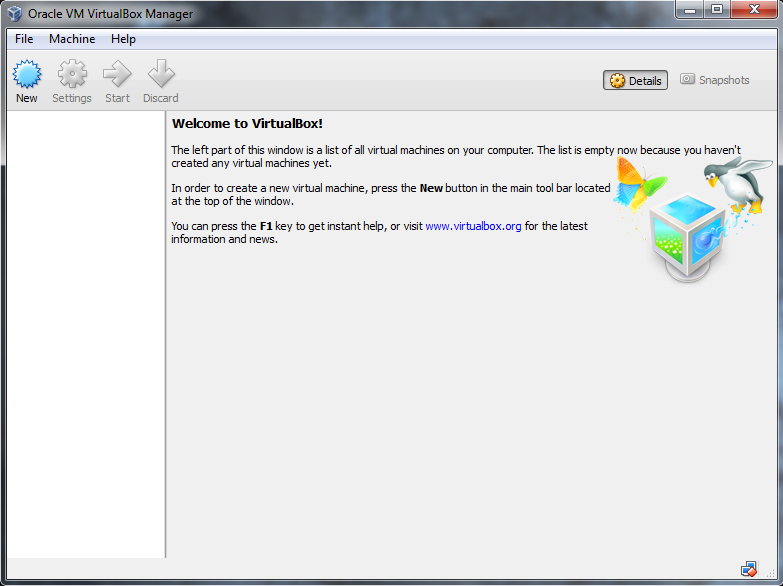
- Click the ” New” button.
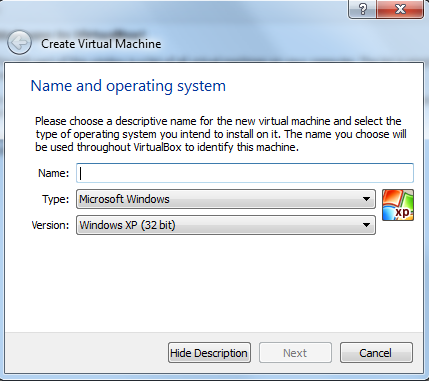
This brings up the VM building window:
You can see
- a text box for you to give a name to your VM (say, “Fedora Scientific”)
- a dropdown menu for the “Type” of OS: Windows, Linux, Mac, etc.
- a dropdown menu for the “Version” of the OS: Windows XP, Win7, Fedora Linux, Ubuntu Linux, etc.
Before proceeding, let’s check something first.
Remember your Preperations Find out what kind of hardware you have? You found if you have a 32-bit or 64-bit computer.
If you have a 32-bit machine, then you can skip the following BIOS alterations, and just jump to here: config-the-vm.
However, if you have a 64-bit machine, you will want to take full advantage of that big fat data bus. Check the following.
2.6. Turn on Virtualization in your BIOS?
- Click on ” Type”, and select ” Linux“
- Click on the ” Version” menu, and look at the options.
- Do you see only ** 32 bit ** choices, i.e. no 64 bit choices? Like this:
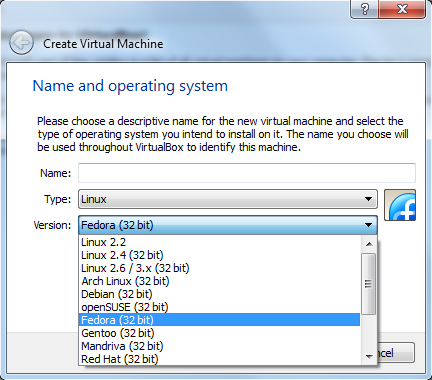
If so, then your computer has ” Hardware Virtualization ” turned OFF. You can turn it ON (or try to, at least), by doing the following:
Reboot your computer
Halt the boot process and enter your BIOS system
This is usually done by hitting an F-Key during the boot process (Often your system says somthing like “Hit F10 to enter BIOS options” during the boot process. If so, hit the key mentioned (F10, F2, ESC, etc.), or search the internet for “your computer manufacturer” “model” and “BIOS Key”, on the internet.
Enter the BIOS system, choose the “Security” tab, look through the options and find:
- VT/x (or VT-x, or Virtualization Technology)
- VT/d (or VT-d, or Virtualization Technology Directed I/O)
“Enable” VT-x, and VT-d if it is there.. Below is a screen shot of my BIOS page–yours may look different, but should be similar. In particular, you should be able to find the VT-x and VT-d items. If you can only find VT-x, that is fine–turn that ON (Enabled).

- Once these things are enabled, Reboot.
- Start VirtualBox again.
If you have trouble with this, let me know and I’ll try to help. However, if we can’t get Hardware Virtualization enabled, you can still proceed and install a 32-bit version of Fedora Scientific (and probably won’t even notice the difference).
2.7. Configuring the VM
Now, with Hardware Virtualization enabled, you should see both 32 bit and 64 bit OS versions versions like this:
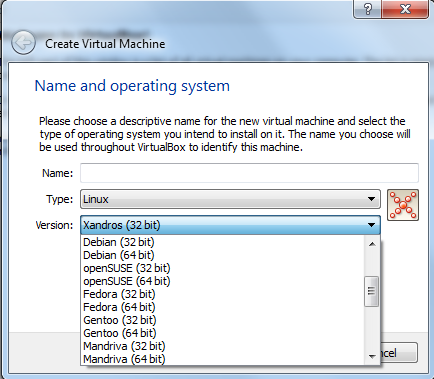
Having selected “Linux” as the Type of OS, Select “Fedora (64 bit) or (32 bit) depending on your data bus width. And give your VM a name like: Fedora Scientific.
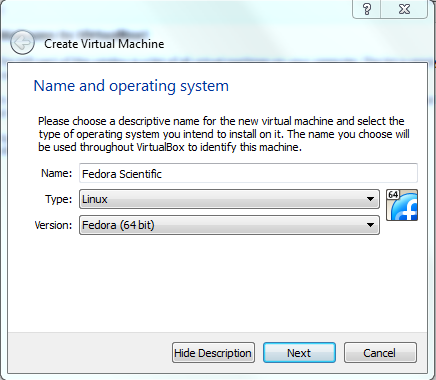
Click Next.
You will get this screen, where you will assign the memory for your VM.
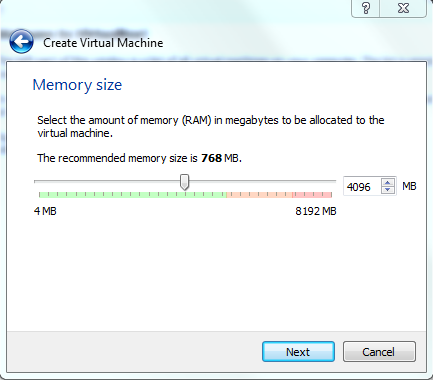
I typically assign Half of the memory of my machine to the VM. So, if your computer has 4 Gb or memory (also called RAM–Random Access Memory), I would assign 2 Gb to my VM. The window will show you the minimum recommended memory. You will want more than that, but not so much that you are moving the slider into the RED region.
This memory will only be assigned to the VM when it is running, when presumably you will want it! As a minimum , don’t use less than 1 Gb. Note that you can type a number in the box too–you don’t have to use the slider or Up/Dn arrow buttons.
If you have trouble deciding on the amount, let me know–but you might as well try half of your physical memory for starters.
Click Next when you have set the memory size.
Now, you will setup the virtual disk system for the VM.
Select “Create a virtual hard drive now”, then click Next.
Click the default type: “VDI VirtualBox Disk Image”. Then click Next.
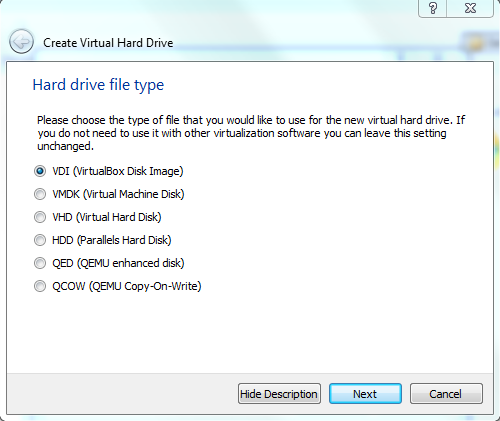
You will want one that is ” Dynamically Allocated”. This means that even though you set a maximum disk size of, say 40 Gb (which you will do shortly), you will not instantly see this much less free space on your hard drive. The VM will only use the amount of diskspace required to hold the files you create on your VM.
So, check “Dynamically Allocated”, an click Next.
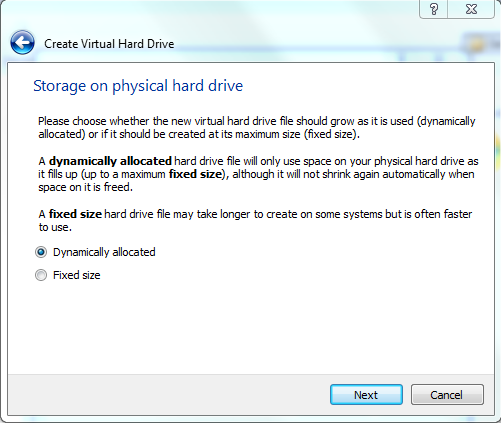
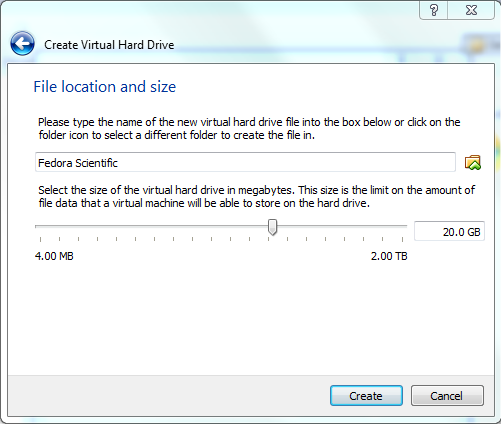
Now you have to choose the maximum size of the disk for your VM. You could go a small as a couple Gb’s, however I would suggest between 10-50 Gb for your Fedora Scientific VM.
You will be able to change this later if you wish–so you can add more space if you start to use your Fedora Scientific VM for a lot of your scientific work (I hope that is the case!).
Choose your disk size, and click Create.
You’ve just configured your Fedora Linux Virtual Machine ! You should be back in the main VirtualBox application window, but now there will be one VM icon on the left panel, with the name of your VM. I will assume you named it “Fedora Scientific”.
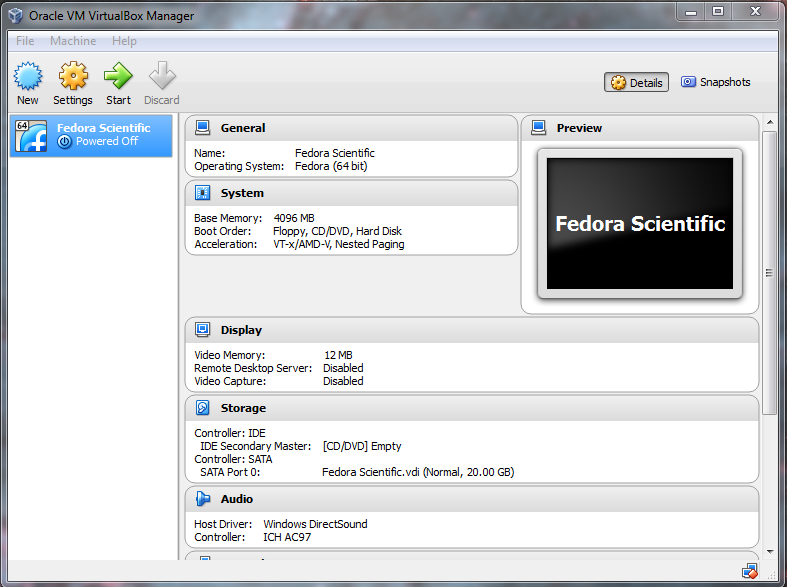
Don’t Start it Yet!
Before you start your new VM, you have put the Fedora Scientific DVD (the .iso file) into the DVD drive.
2.8. Attach the Fedora Scientific ISO Disk
Your new VM is ready to start, but it has no OS on its hard drive (like your computer does). So if you were to start it, it would just turn on and wait.
When you build a new computer from scratch, or install a new OS on a computer, typically you buy (or download) a DVD (or ISO file) with the new OS on it, load this in the DVD tray, and start the machine. When it boots, it will first look in the DVD/CD tray to see if there is a bootable disk there. If so, it boots an OS from that disk. Once that OS is loaded into memory, the computer can carry out instructions and has basic functionality–often just enough to read the new OS from the DVD and write it to the hard drive.
That’s what we’re going to do here. Except that the OS we want is in the form of the “Fedora Scientific Linux” ISO file that we downloaded in the last section software. ISO files are disk images of a CD or DVD. We are going to put this file in a Virtual DVD Drive (How cool is that!).
To do this, make sure that your Fedora Scientific VM is highlighted in the left panel. It should be, since it is probably the only one there.
Click “Settings” on the top panel.

You will see this window.
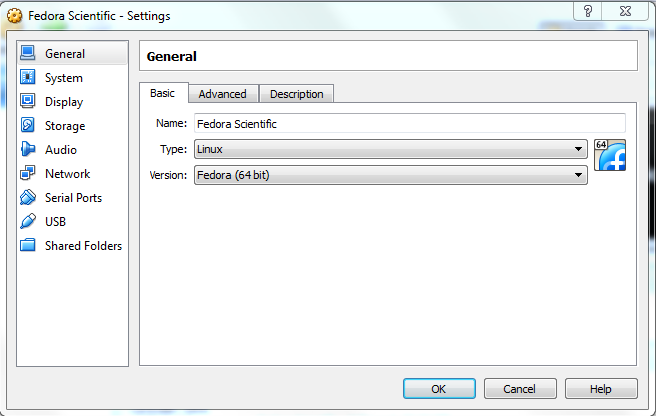
Click “Storage” on the left menu, to bring this window forward.
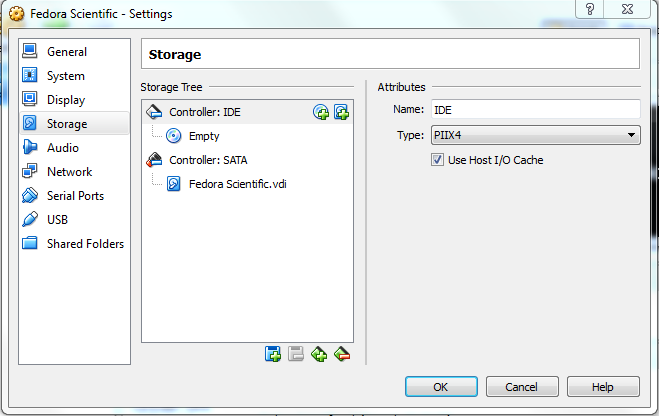
Click the “Empty” CD icon under “Controller: IDE”.
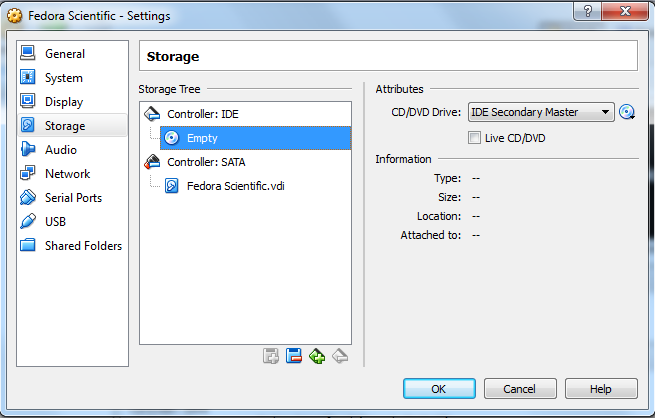
Then, with Empty highlighted, click the CD icon beside the line that says: “CD/DVD Drive: Secondary IDE Master”. This drops a menu box like this:
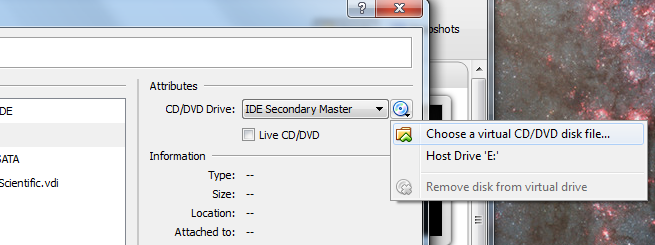
Select “Choose a virtual CD/DVD disk file...
Browse your computer to find the Fedora-Live-Scientific-KDE...-20.iso
file that you downloaded during your Preparations in the last section
software.
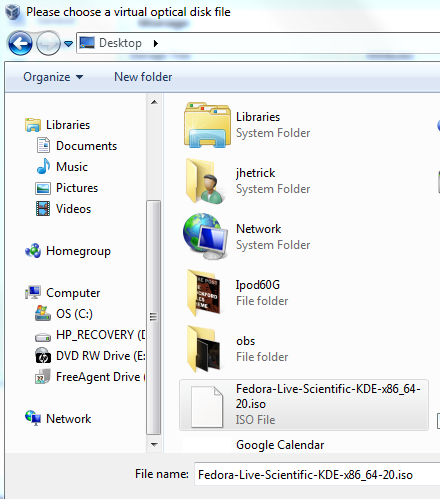
Once you have selected this file, you should see its properties in the Information section of that window, below the CD/DVD Drive. Also check “Live CD/DVD”.
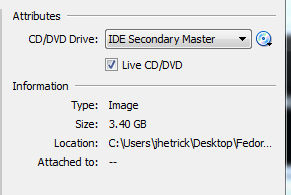
At this point, you have virtually loaded a virtual DVD into your Virtual Machine’s virtual DVD drive. Thus when you turn on the machine, it will boot the installation sequence from this virtual Fedora DVD file.
Click ” OK” and return to the main VirtualBox window.

You are now ready to power up your Virtual Machine for the first time
Go ahead and click the ” Start” -> button and move on to the next section.
