2.14. Installing ” Guest Additions ” on your VM
2.15. First Look at Linux
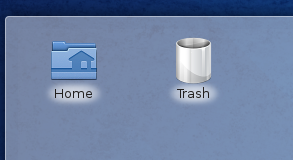
Once you have the login page for Fedora, login as the Standard User. You should be looking at your Desktop , with Home and Trash icons.
In the previous section, you installed Fedora Scientific Linux onto a VM.
At the end of that section, you were left with the Desktop and encouraged to “look around”.
Let’s start with your “Home” folder.
Double Click the Home icon.
This opens the Dolphin File Viewer . Dolphin is the name for the File Viewer/Navigator system of the KDE desktop. It’s similar to Window’s Explorer or the Mac’s Finder .
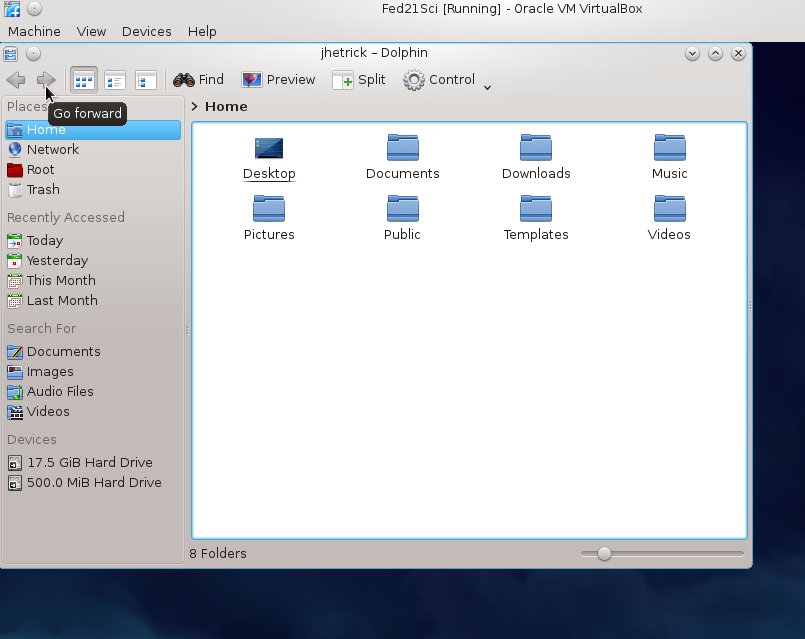
You can see the Sub-folders under your “Home” folder. They
too should look familiar–Documents, Downloads, Pictures, Music,...
In fact, so far this could just be a sexy blue Windows machine.
The real power of Unix however, is going to shine when you get used to using the Unix Terminal and its simple command line for controlling your computer. This is the first thing a hacker wants.
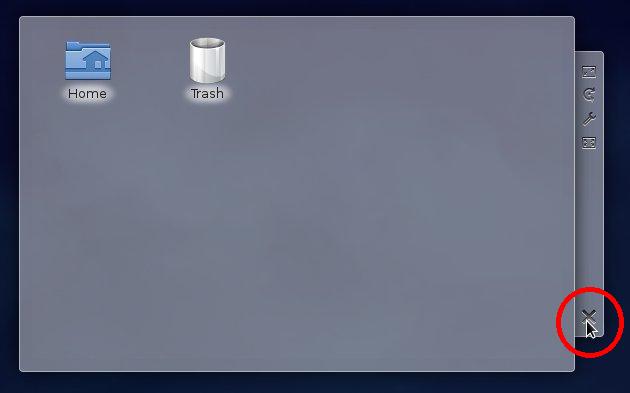
Close your Dolphin file explorer, by clicking the (x) in the upper
right corner on the window.
I don’t use the GUI File Explorer much with Linux; I find it is much easier to use the text-based “Terminal”, which I will describe below. So, I recommend that you Close the Home/Trash Window by finding and Clicking on the X that pops out to the right of the window:
Next: Click on the “Kickoff Application Launcher“
or “Start Orb“—as I called it earlier. It’s the little (f) button
in the lower left. This brings up a multi-tabbed menu interface.
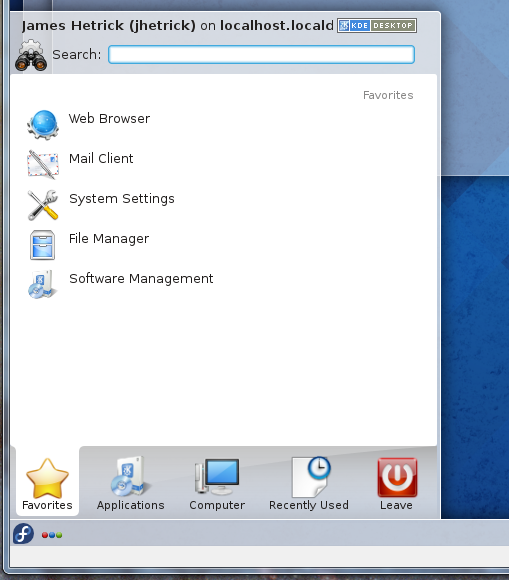
The Default tab is “Favorites” with some common Applications like a
Web Browser and Mail Client . Later I’ll show you how to configure
your favorites here.
Now click on the “Applications” tab. You can see a large number
of Categories: Multimedia, Office, Science and Math, etc. Feel free
to explore—this list has all the programs and applications that came
free with your Fedora Scientific installation.
In particular, click the “System” Category, and scroll down to
“Terminal / Konsole”. There are a couple different Terminal
programs—I’m going to use the “Konsole” one (the name is in small print
underneath the icon.
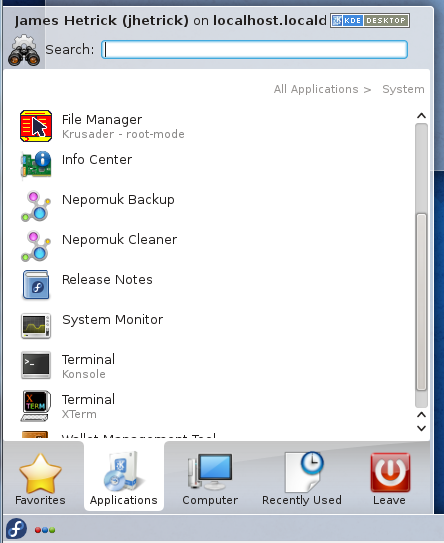
Before you Click to start it (or find it again if you already
did), Right-Click on the “Terminal” icon to open the menu below.
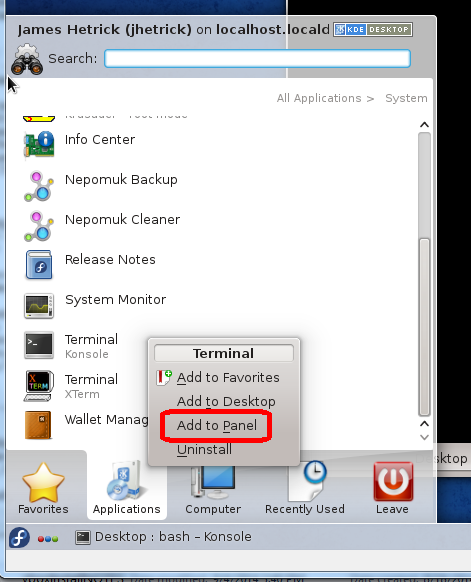
From this menu, Click “Add to Panel”.
Notice that you now have a little TV/Display Terminal icon on the lower right of the “Panel”, which the bar that stretches across the bottom of the display.

You now have a handy “Launcher” for a Terminal .
Click the new little Terminal now.
You will see a black window pop up, and some text ending with a “$”.
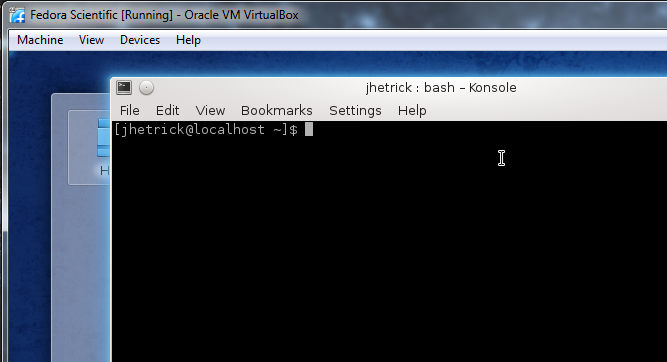
That’s what I’m talkin’ about!
Welcome to the Heart of the Machine, my young dudes.
With this Command Line Prompt and the Root password, you can do anything on this machine.
Let’s issue our first Unix command. Type:
ls
in the new Terminal window, followed by ENTER.
This is the List (ls) command, and the Terminal will show you the
contents of your “Home” Directory (or Folder).
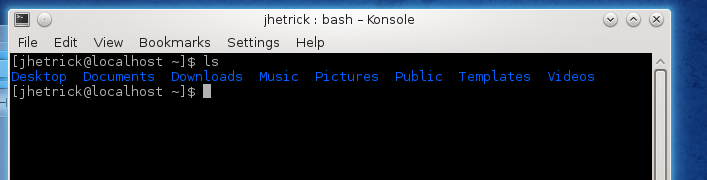
Folders (or “Directories” as folders are called in Unix) are shown in Blue . If you still have your ” Home ” folder open in the Dolphin File Explorer, compare the two. The ” ls” listing should show the same directories (or folders) as you see with the graphical Dolphin explorer. Move the windows around and confirm this. Compare the output above, from the Terminal and ls, to the files below, from the Dolphin File Explorer window. http://dirac.physics.pacific.edu/phys/jhetrick/www/phys27/rev2014/filelist.html .. image:: imgs/finst28crp.PNG
2.16. Prepare for Guest Additions
We’ll come back to learning all about the Terminal (and more importantly the “Shell” sometimes). For now however, we want to use the Terminal to do some administration of the system and to install the “Guest Additions”. Guest Additions are a number of auxiliary programs and features which you add to your Linux/Desktop/VirtualBox system that make life easier.
To do this, Locate or Start a Terminal window. If the one you had open from the above explorations is still open, use it.
At the prompt (which means, Click the Terminal and enter the following
commands after the $ sign), type:
su
Followed by ENTER. This is the Set User or Super User command (su).
With no username after it, su changes the user to the Root (Super) user.
The terminal will respond like this: Password:
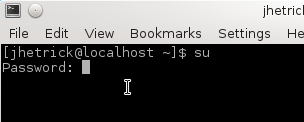
asking for the Root password.
Enter the password for the Root account that you created earlier.
(You did remember it, right?)
Once you have entered the password—and
notice that the terminal does not echo ********** as you type
the password–the prompt will return. It looks almost the same except
that the first word is now root instead of the standard user, and the
last character is a # instead of a $.
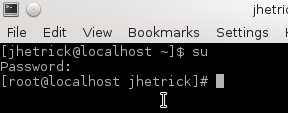
You are now root .
If you are a fan of the movie “Guardians of the Galaxy”, you may like to say I am Root, over and over.
As root , you do have superpowers. You can delete the entire file system with one command. So be careful. We are not going to do much.
2.16.1. Update your system
First, you really should update your system. This will take about 15-30 minutes, so do it when you can read a book while the update happens.
We will use yum (Yellowdog Updater, Modified).
Yum allows you to very easily install and maintain packages on you linux system. There are many
variants of Linux: Fedora, Ubuntu, Suse, Debian, etc. Yum is the updater used by Fedora Linux,
while apt-get is the one used by Ubuntu, just in case you run across there terms out there somewhere.
In your Root Terminal window, type:
yum update
at the # prompt. Then hit ENTER.
Your terminal will show some text, something like this:
root@localhost jhetrick]# yum update
Loaded plugins: langpacks, refresh-packagekit
updates/20/x86_64/metalink                              |  15 kB  00:00:00
Then a huge number of Packages to be updates, like this:
Resolving Dependencies
--> Running transaction check
---> Package 4ti2.x86_64 0:1.6-1.fc20 will be updated
---> Package 4ti2.x86_64 0:1.6.2-3.fc20 will be an update
---> Package 4ti2-libs.x86_64 0:1.6-1.fc20 will be updated
---> Package 4ti2-libs.x86_64 0:1.6.2-3.fc20 will be an update
---> Package Cython.x86_64 0:0.19-2.fc20 will be updated
---> Package Cython.x86_64 0:0.21.1-1.fc20 will be an update
---> Package GitPython.noarch 0:0.3.2-0.5.RC1.fc20 will be updated
---> Package GitPython.noarch 0:0.3.2-0.6.RC1.fc20 will be an update
---> Package GraphicsMagick.x86_64 0:1.3.18-4.fc20 will be obsoleted
---> Package GraphicsMagick.x86_64 0:1.3.20-3.fc20 will be obsoleting
---> Package GraphicsMagick-c++.x86_64 0:1.3.18-4.fc20 will be updated
---> Package GraphicsMagick-c++.x86_64 0:1.3.20-3.fc20 will be an update
---> Package GraphicsMagick-doc.noarch 0:1.3.20-3.fc20 will be obsoleting
---> Package ImageMagick.x86_64 0:6.8.6.3-3.fc20 will be updated
---> Package ImageMagick.x86_64 0:6.8.6.3-4.fc20 will be an update
---> Package ImageMagick-c++.x86_64 0:6.8.6.3-3.fc20 will be updated
---> Package ImageMagick-c++.x86_64 0:6.8.6.3-4.fc20 will be an update
---> Package ImageMagick-libs.x86_64 0:6.8.6.3-3.fc20 will be updated
...
Don’t be surprized if it’s hundreds (even in the 1000s). After the packages stop streaming past the window, the system will pause with a message like this:
Transaction Summary
=============================================================================
Install   20 Packages (+ 147 Dependent packages)
Upgrade  514 Packages (+1047 Dependent packages)

Total download size: 2.6 G
Is this ok [y/d/N]:
Yeah; I just did this on my system and it says “Total download size: 2.6 G”.
Don’t worry—It won’t take up that much space on your disk. Most of the packages will replace
currently installed packages. Then it will erase the downloaded files.
The system is waiting for you to type: y to tell it to begin the Update process. So,
type y.
Go get some coffee, or your favorite beverage.
Yum will start downloading the packages.
Downloading packages:
updates/20/x86_64/prestodelta                                                              | 3.0 MB  00:00:19
Delta RPMs reduced 2.1 G of updates to 448 M (79% saved)
(1/1728): GitPython-0.3.2-0.5.RC1.fc20_0.3.2-0.6.RC1.fc20.noarch.drpm                      |  41 kB  00:00:00
(2/1728): 4ti2-1.6-1.fc20_1.6.2-3.fc20.x86_64.drpm                                         |  20 kB  00:00:01
(3/1728): GraphicsMagick-c++-1.3.18-4.fc20_1.3.20-3.fc20.x86_64.drpm                       |  34 kB  00:00:01
(4/1728): ImageMagick-6.8.6.3-3.fc20_6.8.6.3-4.fc20.x86_64.drpm                            |  44 kB  00:00:00
(5/1728): ImageMagick-c++-6.8.6.3-3.fc20_6.8.6.3-4.fc20.x86_64.drpm                        |  29 kB  00:00:00
(6/1728): ImageMagick-perl-6.8.6.3-3.fc20_6.8.6.3-4.fc20.x86_64.drpm                       |  55 kB  00:00:00
...
You can see—I have 1728 packages to install! This will take about half an hour.
Finally, my terminal says, simply:
Complete!
[root@localhost jhetrick]#
The update is done, and you can move on to Upgrading the Kernel.
Warning
If you run into problems of disk space, you can do a simpler update, of just your kernel. To do this, type:
- yum clean all (to get rid of any old files taking up space)
- yum update kernel
- then, shut down/restart your VM
2.17. Upgrade your Kernel
Now, we are going to upgrade the Linux kernel to make it ready for the Guest Additions. To do so, type:
yum install dkms kernel-devel kernel-headers
and hit ENTER.
Some stuff will happen. Resulting in a line that says:
Is this ok [y/d/N]:
Yum is the Fedora software updater–it is waiting for you to give it the OK to install the things we typed above.
Hit y (ENTER).
Yum will do some more stuff (getting the software, checking dependencies, installing, updating, etc. Finally, you will see the word Complete!, which means that the kernel upgrade worked.
Time to reboot the machine.
Close all your open windows by Clicking on the (x)‘s on the upper
right corner of the windows. Then Click “Start” (f) , and
Leave -> Shutdown.
Let the machine power down.
2.17.1. Run the Guest Additions Script
If you haven’t done so,
- Start VirtualBox.
- Highlight your Fedora Scientific VM.
- and press the Start ( -> ) button at the top to launch your Fedora VM
- Login as the Standard User
Open a Terminal window by Clicking on the Terminal* icon on the Panel.
At the prompt in the terminal, become root by typing:
su
followed by the root password.
Now, At the very top of your VM window, Click “Devices”, and select:
Insert Guest Additions CD image.
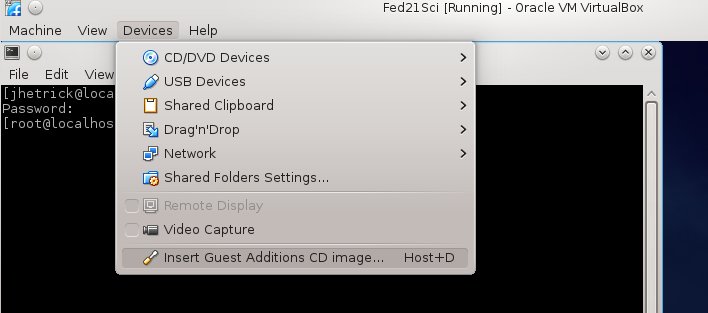
In a few seconds, a Message Window will pop up.

Click Open with File Manager
This will open a Dolphin File Explorer, and you can see the files contained on the Guest Addition CD .
If you missed the pop-up window, don't worry! (It seems to disappear after a few seconds).

Just **click** on the (f) "Start" (called the Kickoff Launcher) button,
then click the **Computer Tab** on the lower left of the screen. Find the CD name at the bottom
``VBOXADDITIONS_4.3.x_nnnnnnn``. **Click on that.

.. image:: imgs/guestAddsComputerFileMngr.jpg

This will open the Dolphin File Explorer also.
For some strange reason, the system will only link the VBOXADDITIONS.. CD to the
system when you open it in the Dolphin file explorer. So we have to do the step above.
Once the Dolphin file browser has opened—which links the CD to the appropriate
location (as we’ll see next)—you can close the Dolphin explorer, by clicking
on the (x) on its upper right.
Now, return your attention to the Terminal window you opened. The one that has the root prompt: ``[root@localhost jhetrick]# ``.
Change directories to the location of the VBOXADDITIONS CD, but typing:
cd /run/media/jhetrick (substitute YOURUSERNAME for jhetrick)
then do a listing of the directory, by typing ls (ell ess).
You should see the CD there as a subdirectory:
[root@localhost jhetric]# ls
VBOXADDTITIONS_4.3.16_95972
Type:
cd V(TAB)
i.e. type cd V, then (without hitting ENTER) hit the TAB key. This will *auto-complete the rest of the file name, and save you having to type all the characters.
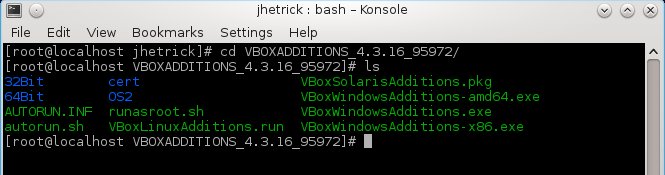
Now type:
./VBoxLinuxAdditions.run
The shell will reply with:
[root@localhost VBOXADDITIONS_4.3.16_95972]# ./VBoxLinuxAdditions.run

Verifying archive integrity... All good.
Uncompressing VirtualBox 4.3.16 Guest Additions for Linux............
VirtualBox Guest Additions installer
Removing installed version 4.3.16 of VirtualBox Guest Additions...
Copying additional installer modules ...
Installing additional modules ...
Removing existing VirtualBox DKMS kernel modules           [  OK  ]
Removing existing VirtualBox non-DKMS kernel modules       [  OK  ]
Building the VirtualBox Guest Additions kernel modules
Building the main Guest Additions module                   [  OK  ]
Building the shared folder support module                  [  OK  ]
Building the OpenGL support module                         [FAILED]
(Look at /var/log/vboxadd-install.log to find out what went wrong)
Doing non-kernel setup of the Guest Additions              [  OK  ]
Installing the Window System drivers
Installing X.Org Server 1.16 modules                       [  OK  ]
Setting up the Window System to use the Guest Additions    [  OK  ]
You may need to restart the hal service and the Window System (or just restart
the guest system) to enable the Guest Additions.

Installing graphics libraries and desktop services componen[  OK  ]
[root@localhost VBOXADDITIONS_4.3.16_95972]#
Don’t worry if you get: Building the OpenGL support module [FAILED].
Now Reboot again...
By now you should be proficient at shutting down the VM via the Start (f) Orb -> Leave -> Shutdown , and restarting it from the Oracle VirtualBox window using the **Start**(->) button.
When you see the login screen, login as yourself (i.e. the standard user).
Now the magic begins...
At the top of the window, you should see a row of menu items like this:

Click the View menu, to show these options:
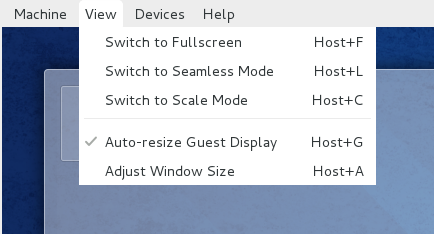
One of them is obvious: Fullscreen mode. Let’s try it out.
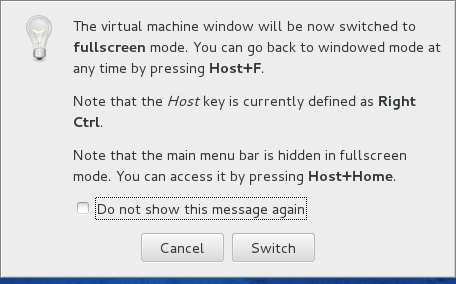
Click “Switch to Fullscreen”.
This will pop up a window telling us how to recover from this little adventure.
Note
Since your VM wants the keyboard, and your “Host” machine (PC or Mac) wants the keyboard we have to define a “Safe“-key, which is called the “Host Key”.
Of course, you can redefine this to something else if you like, but for now the default is
- On a PC: Host Key = Right-CTRL, i.e. the Control key on the
Right side of the keyboard.
- On a Mac: Host Key = Left-Command Key, i.e. the Command key on the Left side of the keyboard (the Command Key on a Mac keyboard looks like a 4-leaf clover).
Once you go Fullscreen there are two ways to get back to “normal”.
- One way is to press “Host + F”, which translates to the Right-Ctrl + F keys together.
- The other way is to hit the Host + Home keys together (Right-Ctrl + Home).
This pops up a little menu with Machine, View, Devices, etc., lets you select View and uncheck Fullscreen .
So, let’s try the Guest Addition of Fullscreen View.
Get ready. READ THIS FIRST.
You are going to: Click View->**Switch to Fullscreen** at the top of your VM window.
BUT REMEMBER: To switch back from Fullscreen, Type “HOST Key + HOME”. What’s your HOST Key again? (PC: Right-Ctrl Mac: Left-Command)
Then CLick View and Uncheck “Switch to Fullscreen” to come back.
You probably won’t be able to see this page once you go Fullscreen with your VM.
Did it work?
Next try Seamless Mode. This is a really cool Addition. It allows
you to basically have the functionality of both OS’s—your native
computer and Linux—running simultaneously.
So, again: Be ready to hit the Host + Home keys together to come back, if you need to. At the top of the VM window, Click View->Switch to Seamless Mode. You should have a Panel (a long “Taskbar”) at the bottom of your desktop.
Click the Terminal icon on the Panel.
This should open a Terminal on your Desktop.
How cool is that?!
You are now ready to start doing science with your Linux system. In the next section we will make a couple more simple alterations which will make your environment even easier to use.